Sunday, February 27, 2011

cake-in-a-box

When I first started baking, I relied heavily on boxed cake mixes. Actually, everything I baked came from a box - brownies, cookies, muffins, you name it: boxed. The time I said I would make homemade cupcakes for our sixth grade bake sale? Well, Betty Crocker made it, I just added eggs and water. There I said it! I have been keeping that secret for years. Whoo, now that I've got that off my chest...

And while I can finally make things from scratch, meaning I actually add more than eggs and water, I still like using boxed mixes every now and then. It saves a lot of time or when you're short on ingredients and tastes just as good with some googled techniques. This year was the first year I ever made an actual birthday cake - because although my baking skills have improved, my decorating skills are pretty much non-existent.While I still have a long way to go before I have a Martha Stewart magazine cover worthy cake, I was told it was enjoyed by many! I'm not a professional baker, and my techniques might be a bit, or really, off - but this is whatever works for me. Feel free to give me some tips! 


Cake-in-a-Box

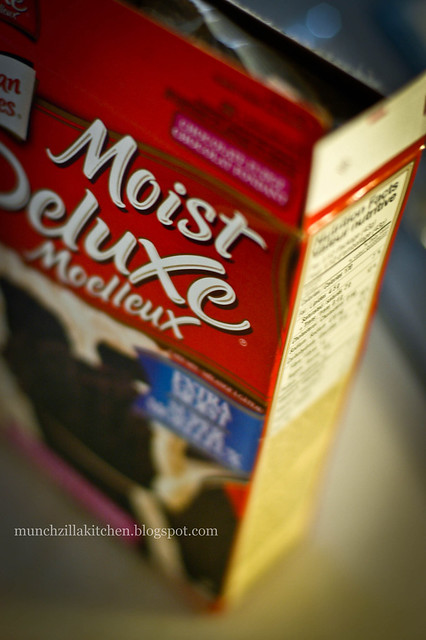
1 box of Duncan Hanes extra moist: chocolate fudge cake mix (or any other flavor you like)
3 eggs
1/2 cup of oil
milk


Whip-Cream Icing
1 container of Cool Whip
1 cup mascarpone cheese
1 teaspoon vanilla
1/4 cup icing sugar

Additional: 
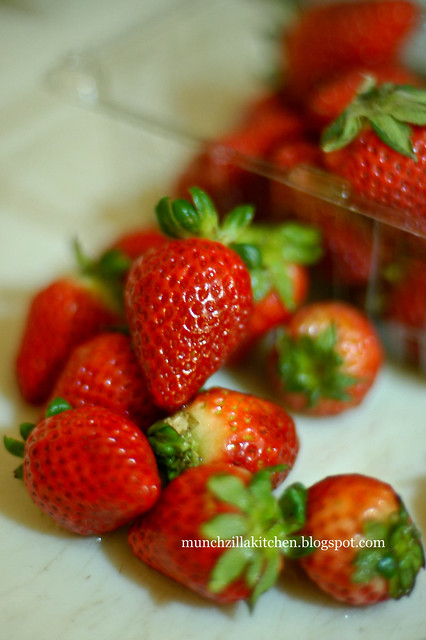
12-15 strawberries, set aside enough strawberries to go around the circumference of your cake and cut the tops off; try to keep these selected strawberries all the same height and if not, cut it to size. Take the left over bits and a few extra berries and dice them up.

Cake: First of all, preheat your oven to 350 degrees. I always forget this step, so I usually end up waiting a while after I'm done the batter.
 Instead of cracking all the eggs into one bowl, separate the whites into a smaller bowl and the yolks into a larger mixing bowl. With a balloon whisk - if you're feeling the need for a work-out - or a electric hand mixer, beat the egg whites first until stiff peaks form. Set that aside in the fridge and then mix the egg yolks until creamy. In the same bowl as the yolks, pour in the milk (I don't remember how much I used, but I followed the box amount), oil, and the cake mix. With a spatula, cut into the mix to break up any lumps. Using a whisk or hand mixer on medium speed, blend all the ingredients together. When there are no lumps are left - it took me around 2 minutes - gently fold in the egg whites in two parts.
Lightly grease your baking pan with butter and then pour in your batter. I used a springform pan, so I didn't line it with parchment paper but if you're using a regular pan, it might be a good idea to. Give it a quick tap and pop it in your oven on the middle rack for however long, depending on the size of your pan. For me, it took around an hour to bake a 9-inch cake. It sounds a bit excessive and I think it was because my oven temperature was off, but that's how long it took me. If you're not sure, stick a wooden skewer or chopstick into the cake and if it comes out clean with a few crumbs, it should be done.   
When your timer rings, take your cake out. If you are using a spring form pan, remove the ring and let it cool for a few minutes before transferring it to a cooling rack. If you are not using a spring form pan, let it cool for a few minutes in the pan then run a knife around the edges and flip it onto a cooling rack. After about 10-15 minutes, cut the cake in half horizontally to get two layers. 

Whip-Cream Icing: While your cake is cooling, prepare the icing. Using an electric mixer, soften up the mascarpone and then add in the vanilla and icing sugar and blend until combined. Switch to a rubber spatula and fold in the cool whip in two parts until thoroughly mixed. If you want a thicker and denser icing, use less cool whip. I used cool whip because it was convenient, but you could also make your own whip cream. Instead of adding the icing sugar to the mascarpone, add it gradually to the cream while whipping. Cool in the fridge for a few minutes before using.

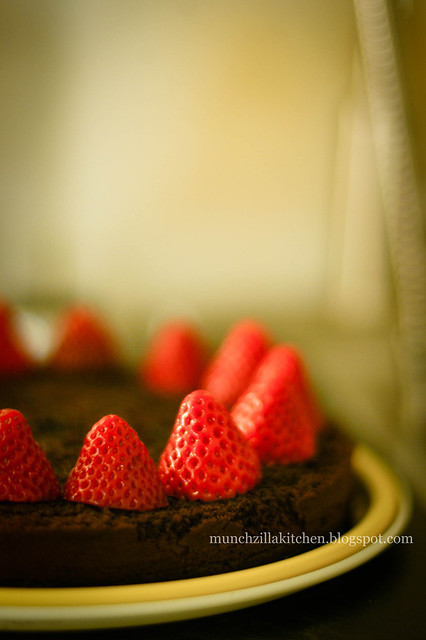
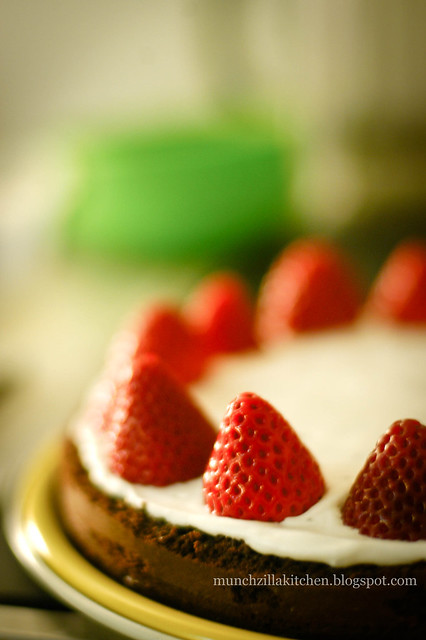
Assemble: Make sure your cake has completely cooled down before assembling! Spread a thin layer of icing on the bottom of one layer with a metal spatula. This collects all the crumbs and "glues" it down on the cake and keeps your strawberries from rolling around later. Arrange the whole strawberries you set aside earlier around the outer edge of the cake.
Take the diced up strawberries and sprinkle it evenly in the middle of the strawberry ring you created earlier. With your spatula, drop a large amount of cream in the middle and gently push it out. Keep repeating this step until all the cracks between the strawberries are filled. Once done, take the second layer of cake and place it on top. If your strawberries are all equal in height, the second layer of cake should lie evenly across.
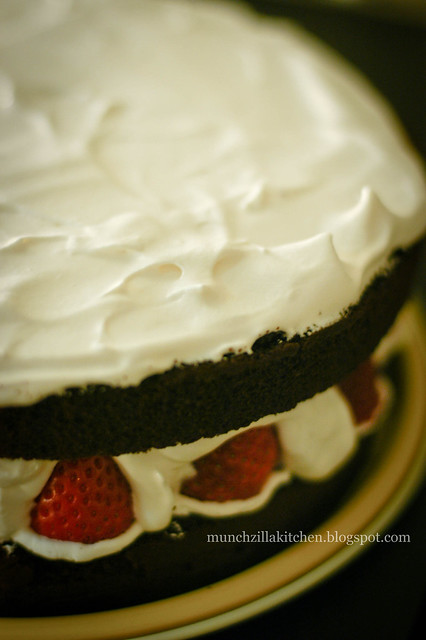
Scrape the remaining cream on top, in the middle of the cake layer you just added, and push it out with your spatula. Run your spatula on top in a wiggling motion to get a nice soft-peak/wavy pattern. You can serve it right away, but I think its better to chill in the fridge for a few minutes (10-15) to set the cream a bit more.

Saturday, February 26, 2011

tuna salad sandwiches

Who can, between working two jobs, while running a business, and going to school at the same time, can still cater to 12 people? My sister Lisa can. Apparently. How she finds time to do everything, I have no idea.

Originally Lisa's schedule allowed her enough time to prepare the tuna salad sandwiches during her shift at work but she forgot to buy the most important ingredient of tuna salad. No she did not forget the celery. No she did not forget the mayo. She forgot the tuna. She bought everything but the tuna. By the time she realized it, it was too late to go back to the store. I was eating ramen at Benkei when I received her call and almost choked on my noodles laughing at her. But this leads to why she asked me to pick up canned tuna, along with a few other ingredients, and make the sandwiches the next day on my shift. Funny thing was, I did the exact same thing my sister did; I picked up everything on my shopping list but the tuna. Guess the apple really doesn't fall far from the tree, eh?

My sisters recipe is not your standard fourth-grade-tuna-salad-lunchbox recipe. This one incorporates several different textures. The onions add a nice semi-spicy bite; a fresher, crispier crunch from the lettuce; unexpected creamy blocks of avocado; and of course, the unique texture of fish.


Tuna Salad Sandwiches
Yields ~12 sandwiches, or store left-over salad in an air-tight container for a few days.

4 cans of tuna, drained and flaked
1 small red onion
1 ripe avocado
5-6 red-leaf lettuce leaves
1 teaspoon fresh ground pepper
1 teaspoon of salt
Horseradish or Dijon mustard
Mayonnaise
1 teaspoon garlic paste

Additional
12 slices of whole-grain bread
12 slices of white bread 

Tuna salad: Cut the red onion in half and make vertical cuts but do not cut all the way through! Leave about 1 cm at one end intact. Turn the onion half and make vertical cuts perpendicular to your first cut. This way, you will have perfectly diced onions. Repeat same process to the other onion half. Heat some butter in a small frying pan and saute just until the onions becomes slightly translucent in color and aromatic, roughly 3-5 minutes. We want to get rid of that spicy-tang of the onions but still retain it's bite. Once done, take it off the heat and let it cool.
Take a knife and make a cut into the avocado until you hit the pit, then run it all the way around the fruit. Give the avocado a little twist and the two halves should separate. Using the heel of your knife, jam it into the pit and twist your knife - the pit should pop right out. Peel the avocado and cut into cubes. I like to cut my cubes a bit bigger so when I mix it into the other ingredients, it doesn't get mashed.   
Wash and dry the lettuce leaves thoroughly. Roughly chop up the leaves.
Put all the prepared ingredients into a large mixing bowl. Add the mayonnaise, horseradish, and garlic paste and combine thoroughly. Add salt and pepper to taste. How much mayo and horseradish you use is up to you. I like my tuna salad to be a bit smoother, so I used roughly about 1/2 cup of mayonnaise and 1/4 cups of horseradish.

Assemble: Scoop a generous amount of tuna salad onto one slice of bread and spread it evenly. At this point, you can add a bit of cheese and melt it underneath a broiler to transform it into a tuna melt. If not, top off your sandwich and enjoy!

Friday, February 25, 2011

meatball subs with caramelized onions


He made me a sandwich! Well technically I made it myself - he did the onions.

It all started on one lazy Tuesday night when I came across a recipe for meatball subs with caramelized onions. That was when I realized that in all my nineteen years of life, I have never had a western style meatball - never mind a meatball sub. If you are wondering: spaghetti with meatballs? Nope, never had that either. I immediately linked my boyfriend, B, and suggested we make it that weekend. I can honestly say that ever since finding that recipe, meatballs were all I could think about. When Saturday finally rolled in, it was sunny. If you live in Vancouver, you should know that early February consisted of nothing but gray and gray, and more gray. So on that Saturday I was faced with a serious dilemma: enjoy the rare sunny Vancouver weather or stay indoors to cook? Well, obviously meatballs were more important to me than fresh air and sunshine.

This recipe, adapted from Smitten Kitchen, produced exceptionally soft and moist meatballs. They were easy to break apart but still held their shape wonderfully. I made a few changes with the ingredients (meaning I used whatever was in the munching kitchen and what was available at the markets) but followed the same method of cooking. Main difference was that I changed up the seasoning and instead of getting a spicy kick from adding red pepper flakes to the meat, I used a jalapeno Havarti cheese. And I have got to mention that making a channel in your sandwich roll for your meatballs to sit in, is ingenious. Mind-blown.

My first experience with meatballs was definitely a satisfying one. Weird thing was, my meatballs weren't really ball shaped; more like meat-prisms.


Meatball subs with Caramelized Onions
Recipe adapted from Smitten Kitchen.
I usually don't measure when I cook. Measurements here are approximate.
Yields ~14 meatballs depending on size.

Meatballs
Fresh bread crumbs, made from 4 sandwich rolls
2 pounds of ground meat (I used pork, but SmittenKitchen also suggests: beef, veal, chicken, turkey or a combination)
1 1/2 tablespoons chopped oregano
1/2 cup finely grated Parmesan or Romano cheese
3 small garlic cloves, minced
1 tablespoon paprika
3/4 teaspoon sea salt
3/4 teaspoon fresh ground pepper
1 large egg
Olive oil
 2 cups prepared tomato sauce (plus extra if you like a lot of extra sauce)
1 cup of tomato paste
2 bay leafs

Caramelized onions

1 large yellow onion, thinly sliced
butter
olive oil

Additional 
Jalapeno Havarti, grated

Meatballs: Open up your rolls and cut out some of the bread on the bottom-half to create a channel for the meatballs - this keeps the meatballs from rolling around when you are eating it. Take the bread and grind or tear it into small pieces to form breadcrumbs. Set rolls aside but keep them closed, or else the cut surface will dry out.
In a large bowl combine the meat,oregano, Parmesan, garlic, breadcrumbs, paprika, salt and pepper. Crack the egg into your meat mixture, mix, and then slowly add in some warm water bit by bit. I used a little less than the suggested 3/4 cups. You want the meat mixture to be sticky enough to still be able to form into balls and hold it's shape. Shape mixture into meatballs with wet hands.
Heat some oil in a large pan big enough to fit all the meatballs, but only fry in batches. Brown meatballs on all sides. Add oil only when necessary - which shouldn't be often. I suggest using metal tongs to rotate the meatballs as they are easy to break apart.
Take a paper towel and with your tongs, wipe the sauce pan to get rid of any excess oil and burnt meat bits. Turn the heat down to medium and heat up the tomato sauce and tomato paste in the same pan. Mix in a bit of water to dilute it if necessary. Add the bay leaves. When it starts to simmer again, throw in your meatballs, cover the pan and let it simmer lowest heat possible for 25 to 30 minutes, until the meatballs are cooked through. I like to come back and stir the meatballs around a bit to make sure every side gets covered in sauce.

Caramelized Onions: Heat a bit of olive oil and butter in another pan. Add the sliced onions and cook until translucent and slightly browned. We kept this pan on the warmer section of the stove afterward, but if your stove does not have that feature, keeping it in the microwave will keep it from getting cool slower.

Assemble: Lie the rolls on the hinged side and slip a few meatballs into the hollowed-out rolls. My subs fit about 3-4 meatballs comfortably each. Add a bit more sauce, if you like. Top it off with some of the caramelized onions and as much cheese as you like. For the grand finale, place subs under the broiler to make a gooey-mess of the cheese and crisp up the bread.

Sunday, February 20, 2011

Either Cup Richmond

As reading break comes to an end, coffee shops and libraries quickly fill up with students struggling to cram in study material just before school starts - because hey, who really reads during a reading break? Today I spent my day hopping from library, to coffee shops, to a mall food court just to find a place to study; which brings me here: Either Cup in Richmond. Right now. Attempting to study. And honestly, I would rather not be here if Blenz or Waves had room.

To be blunt and cut straight to the chase, I paid $5.54 to use the internet here. They have a minimum purchase of $5.00 in order to use the internet after 6pm - "strictly enforced". In a way I guess that is understandable. They are a small coffee shop serving lattes, fair-trade organic teas, bubble teas, various snacks and pastries, this rule helps them turn over tables quicker and not lose profit to students who buys a cup of tea and sit there for hours. That of which, I am guilty of. So B, C and I, all purchased smoothies - green apple slush, calpico slush and strawberry slush. The bubble tea is not good. I'm sticking to this whole being-blunt-thing and yeah, it's not good. B's green apple barely has any taste and what taste it did have resembled nothing of green apple. Likewise, mine was lacking in taste as well. I gave B a sip and he couldn't figure out what it was until I told him. I didn't get to try C's drink, but I can assume there isn't much flavor to his either. Thankfully, the size you get at Either Cup is a lot smaller than the ~700mL ones you usually see.

$5.00 for a small, bland tasting drink, was not worth it - internet included or not. I guess this is the price you pay for not securing a study spot at, say, around 12:00PM in the greater Vancouver area on the last day of reading break. Ha.

Either Cup Coffee & Tea on Urbanspoon

Friday, February 18, 2011

Hapa Izakaya (Yaletown)


After seeing my friends pictures on facebook I have always wanted to go try the food at Hapa Izakaya; so B, being the thoughtful boyfriend that he is, took me to the Hapa in Yaletown as a surprise on Valentines day. Hapa Izakaya is a Japanese tapas style restaurant. According to our server, each menu item at the different Hapa locations varies a bit depending on the chef.

When we first walked into the restaurant, we were a bit confused. There was no hostess at or near the door and we were not greeted even though it wasn't busy. The bartender looked at us, as did a couple servers, but they just continued to do what they were doing. We didn't know if we were supposed to grab seats ourselves or wait to be seated. Feeling kind of dumb just standing there while everyone was hustling about, we picked an empty seat and sat down. Almost immediately after we took a seat, one of the girls working came up to us and asked if we had reservations or if we were just a walk-in - which we were - and made sure the table we chose was not reserved. A little later our server came and offered us a few warm towels and took down our drink orders: a Hello Kitty and a Harajuku Girl, and gave us a few more minutes to look at our menu. The drinks were fruity and sweet, with little to no alcohol taste - just the way I like it. When it came time for us to order we chose: Wild Salmon Sashimi, Ika Tempura, Ahi Tuna Tacos, Yaki-Udon, Aburi Shime Saba, and Caramel Pudding for dessert.

The Wild Salmon Sashimi was served over ice and came with two kinds of salmon: sockeye and spring. When I first took a bite of the lighter, fattier, slice of salmon, I was able to immediately tell the difference between AYCE/mediocre salmon sashimi and this. It was smooth and full of flavor; cold and fresh. Ika Tempura came next and it was flavourful as well as tender. The batter didn't stick to the squid very well, though. A whole piece of squid came out without the batter when I took a bite! The Ahi Tuna Tacos - cooked tuna, a simple tomato salsa and guacamole all wrapped up in a flour tortilla topped with shredded seaweed. In my opinion, there wasn't much flavor to this and the tuna was a bit dry. What flavor the Tuna Tacos lacked, the Yaki-Udon made up for it. The noodles were cooked just right, nice and chewy, and there was a good ratio of chicken and veggies compared to noodles. My favorite of the night was definitely the Aburi Shime Saba. I would say that dish is a must try. Our server explained that the Saba was already marinated in a way so it resembles pickling - meaning that the fish was already fully cooked and packed with flavor. She then took a torch and charred the tops a bit and suggested we use a little lemon juice to bring out flavor. The fish was so soft and delicate; almost a melt-in-your-mouth type of feeling but with a bit more bite. When she said pickled, I imagined the fish being sour, but it wasn't. It was salted to taste and had a smokey flavor due to it being charred. I loved this dish and I am drooling just thinking about it. The Caramel Pudding was equally as drool-worthy. Normally, I am not a big fan of pudding's, but this caramel pudding might have just changed that. The pudding was really creamy and smooth with just the right amount of sweetness. There was a hint of vanilla and when pared with a bit of the vanilla ice-cream - yum.

Our entire meal came to be about $70.00, including tips. Not bad in my opinion. Despite the bland Ahi Tuna Tacos and a bit of service-confusion in the beginning, everything else was of good quality (the Saba being amazing) and the service picked up. Our server was friendly and knowledgeable of the restaurant. Knowing that it was our first time at Hapa Izakaya, she took the time to explain a bit about the Hapa Izakaya restaurants and how each chef adds their own twists to the menu. I really enjoyed my experience at the Yaletown location and is looking forwards to trying the Robson and Kitslano locations. Hint Hint, B.

Hapa Izakaya (Yaletown) on Urbanspoon

Sunday, February 13, 2011

Happy Sushi

An impromptu dinner arrangement on a Friday night usually equals busy restaurants, which equals long wait times. And so, we ended up at an all-you-can-eat Japanese restaurant: Happy Sushi. I have been to this restaurant before and I didn't like it. However, I believe back then it was under a different name.

Being a party of 7 we expected a bit of a wait, so a server gave us menus and an order sheet so we wouldn't have to wait even longer for food. Their all-you-can-eat (AYCE) menu consists  of three parts: A, B, and C, and you have a choice of having just the A section, combination of A + B or all three. Each section has a nice variety of items. A has the typical AYCE items such as California rolls, salmon sashimi, teryaki chicken and etc. and an item that I found to be really random in a Japanese restaurant: Roti Canai. B had a few more exotic choices of sashimi and rolls such as Tai and Geoduck sushi. I don't recall what was in section C besides Kaki Pon, raw oysters. We chose to order from sections A+B.

Fortunately for us, we didn't have to wait too long. After around ten minutes we got a table - right next to a giant fish tank. It was kind of an awkward place to put a table. You just don't feel comfortable eating raw fish next to well, fish. Anyways, sure enough, we got our food as soon as we sat down. I did not get a chance to try everything that we ordered, but what I did get a chance to try was... meh, nothing great. Our first dish, beef sashimi, was doused in a vinegar based sauce that completely covered the taste of the beef. All I could taste was sauce. Same problem with the Ebi Sunomono. It was so sour and vinegary, I had goosebumps and cringed after my first bite. The fish sashimi - tai, salmon, tuna, and hokkigai - were decent, nothing special. The nigiri sushi though, was disgusting. Not so much because of the fish, but because the rice, in addition to being flavorless, was warm - which made the raw fish on top semi-warm. For me, the words raw fish and warm in one sentence sounds and tastes like food poisoning waiting to happen. Rolls were a bit better, but again, nothing special. The calamari was pretty good; cut thick, crunchy crust, and tender with a bit of a bite. There were also ribs on our table and those were really oily/greasy, but at least they were chewable.

Happy Sushi was not horrible but it wasn't good either, especially for $23 a person. My opinion of this restaurant remains the same despite the name change. At such a high price, I could name so many more cheaper AYCE sushi restaurants with the same, if not even better, quality of food - such as Ninkazu or Tomokazu.  


Happy Sushi on Urbanspoon

Friday, February 11, 2011

Fumisen


Top left: B, Top right: C, Bottom: Mine
A while back B, C, and I got the munchies so went to a spot where 3 food trailers (Fumisen, Shoryumen, and Tenku Bakudanyaki) are located, across RiverRock Casino to grab some Tenku Bakudanyaki - for those who don't know, Tenku Bakudanyaki is basically a really big takoyaki filled with various ingredients such as vegetables, shrimp, octopus, quail egg, and etc. Unfortunately for us, the trailer was out being serviced, so we opted for Fumisen instead. Fumisen is the customizable sushi cone trailer! There are a few sizes at different prices, ranging from $3.75-$8.50, and you can fill them up with various ingredients. B went for a medium cone filled with salmon rice, BBQ unagi, sweet egg, tobiko, and topped with wasamayo. I had a medium cone as well with salmon rice, salmon sashimi, avocado, tobiko, and wasamayo. C chose a combination of both of ours: salmon rice, BBQ unagi, avocado, tobiko and wasamayo for the sauce also.

Fumisen
I love how, unlike most sushi restaurants, these cones are not rice balls with all the toppings literally on the top. You get a good bite of both rice and topping from the beginning of the cone all the way to the end. It's not our first time at Fumisen, and each time I come, I always feel like one cone is never enough. Good thing I have a bit of self-discipline or I'll be hopping over to trailer after trailer!
Fumisen Menu

P.S. Although these food trailers are located outdoors, they do have an enclosed sit-down area; complete with mismatched seating arrangements and a heater!


Fumisen! on Urbanspoon

Wednesday, February 9, 2011

Ginger Fried Rice

I figure it won't be a surprise to my readers to find out that I follow a lot of food blogs. Just the other day I discovered an amazing blog: Smitten Kitchen. I couldn't take my eyes off this blog, I was completely smitten Haha, see what I did there? It took all the will power I had to not press "previous post", and I had book marked so many recipes, that it will probably take me a year to get through all of them.

On this blog I found a recipe for ginger fried rice with a French twist. Now this brings back a lot of memories, as my mom usually makes this when we have a lot of left over rice and it would become my breakfast, lunch, and snack for the next few days. My moms recipe was very simple: eggs, soy sauce, ginger. Smitten's recipe included a few more ingredients such as leeks, garlic, and sprinkled the ginger and placed an egg on top instead of mixing it in with the rice. I combined both recipes using what I had in my fridge - leaning more towards the traditional one - and was really happy with the results.

Ginger Fried Rice
Eggs, Ginger minced, Garlic minced, Green Onion sliced, Day old rice, Soy sauce, Fish sauce, Olive oil, Sesame oil. Outside of baking, I don't measure anything.


First, I sauteed the minced ginger and garlic together in a skillet on medium heat with a bit of Olive oil. Make sure you continuously stir the ginger and garlic or it will burn quickly. When it becomes a golden color, throw in the rice and mixed it up a bit to get rid of any lumps. Add some soy sauce and fish sauce to taste. Take the pan off the burner, crack an egg directly on the rice, stir it in, and then place it back onto the burner. What you are trying to do here is coat each grain of rice with the egg. If you did this correctly you should not see chunks of egg in your rice. Turn the heat up back to high for a few minutes or seconds - depending on how moist you like your rice. After this turn off the heat, mix in the green onion and a dash of sesame oil.


In the same skillet, after you plate the rice, pour some vegetable oil and fry an egg which ever way you like - I did sunny-side up. Season with salt and pepper to taste. Place the egg on top of your rice and sprinkle on a bit of green onion for garnish. Serve.